Collecting configuration information
Before getting your hands dirty with code, some configuration needs to be taken care of. Configuration information collected in this guide is used in later steps of the setup and in the configure() call: 1 or 2.
You do not need to use Firebase to configure Google Sign In.
Android
Follow the two steps below to set up Google Sign In for your Android app.
In case you encounter any of the following issues, revisit this guide - it means the steps below weren't fully completed.
- if you ever get the infamous
DEVELOPER_ERRORerror - if you can sign in with debug APK and not in release (or vice versa)
Step 1: Collect SHA-1 (not SHA-256) certificate fingerprints
Your Android app probably uses multiple signing configurations. For example, an app might be signed differently when building debug and release APKs locally or when building on Expo EAS. Then there's the Play App Signing for store deployments — Google Play Store may re-sign your app using one of its own signing configurations.
If your app is not yet in the Play Store, focus only on the development APK and its SHA-1 certificate fingerprint. You can come back to this guide later when you upload your app to the Play Store.
However, be advised that in the end, you need to get the SHA-1 certificate fingerprints for all signing configurations and then use all of those SHA-1 fingerprints in Step 2 below.
Collect SHA-1 certificate fingerprints from:
- ✅ Any APK or device
- Google Play Store (when downloading from it)
- EAS Build
- Local build
Use the Configuration Doctor. This is the only universal option — it works regardless of how the APK was built or where it came from. The other tabs cover specific scenarios.
- Get a device / emulator with the app installed, or get the APK (build it locally or in cloud, download from the Play Console / Play Store...)
- Run the tool and follow its instructions:
npx @react-native-google-signin/config-doctor
Check if "Google Play App Signing" is enabled for your app in the console. If it is enabled, you need to take the following steps:
- In Google Play Console, navigate to: <Your App> -> Release section (in the left sidebar) -> Setup -> App Signing.
- Under the "App signing key certificate", take note of
SHA-1 certificate fingerprint(s). Play Store sometimes has more than one "App signing key certificate"!
If you use Expo EAS, run eas credentials to obtain
the Keystore information, which includes the SHA-1 fingerprint. See EAS
credentials
docs
to learn more.
- From your project root,
cd android && ./gradlew signingReport. - Scroll to the top of output, see the fingerprints. Debug fingerprint is used for locally-built debug APK, release fingerprint is used for release APK.
Step 2: Add SHA-1 fingerprints to Firebase or Google Cloud Console
For each of the SHA-1 fingerprints obtained in the previous step, follow the instructions below.
- When using Firebase
- When not using Firebase
- Sign in to Firebase Console and open your project.
- Ensure that in the "Authentication" menu, "Google" is enabled as "Sign-in method".
- Click the settings icon and go to "Project settings".
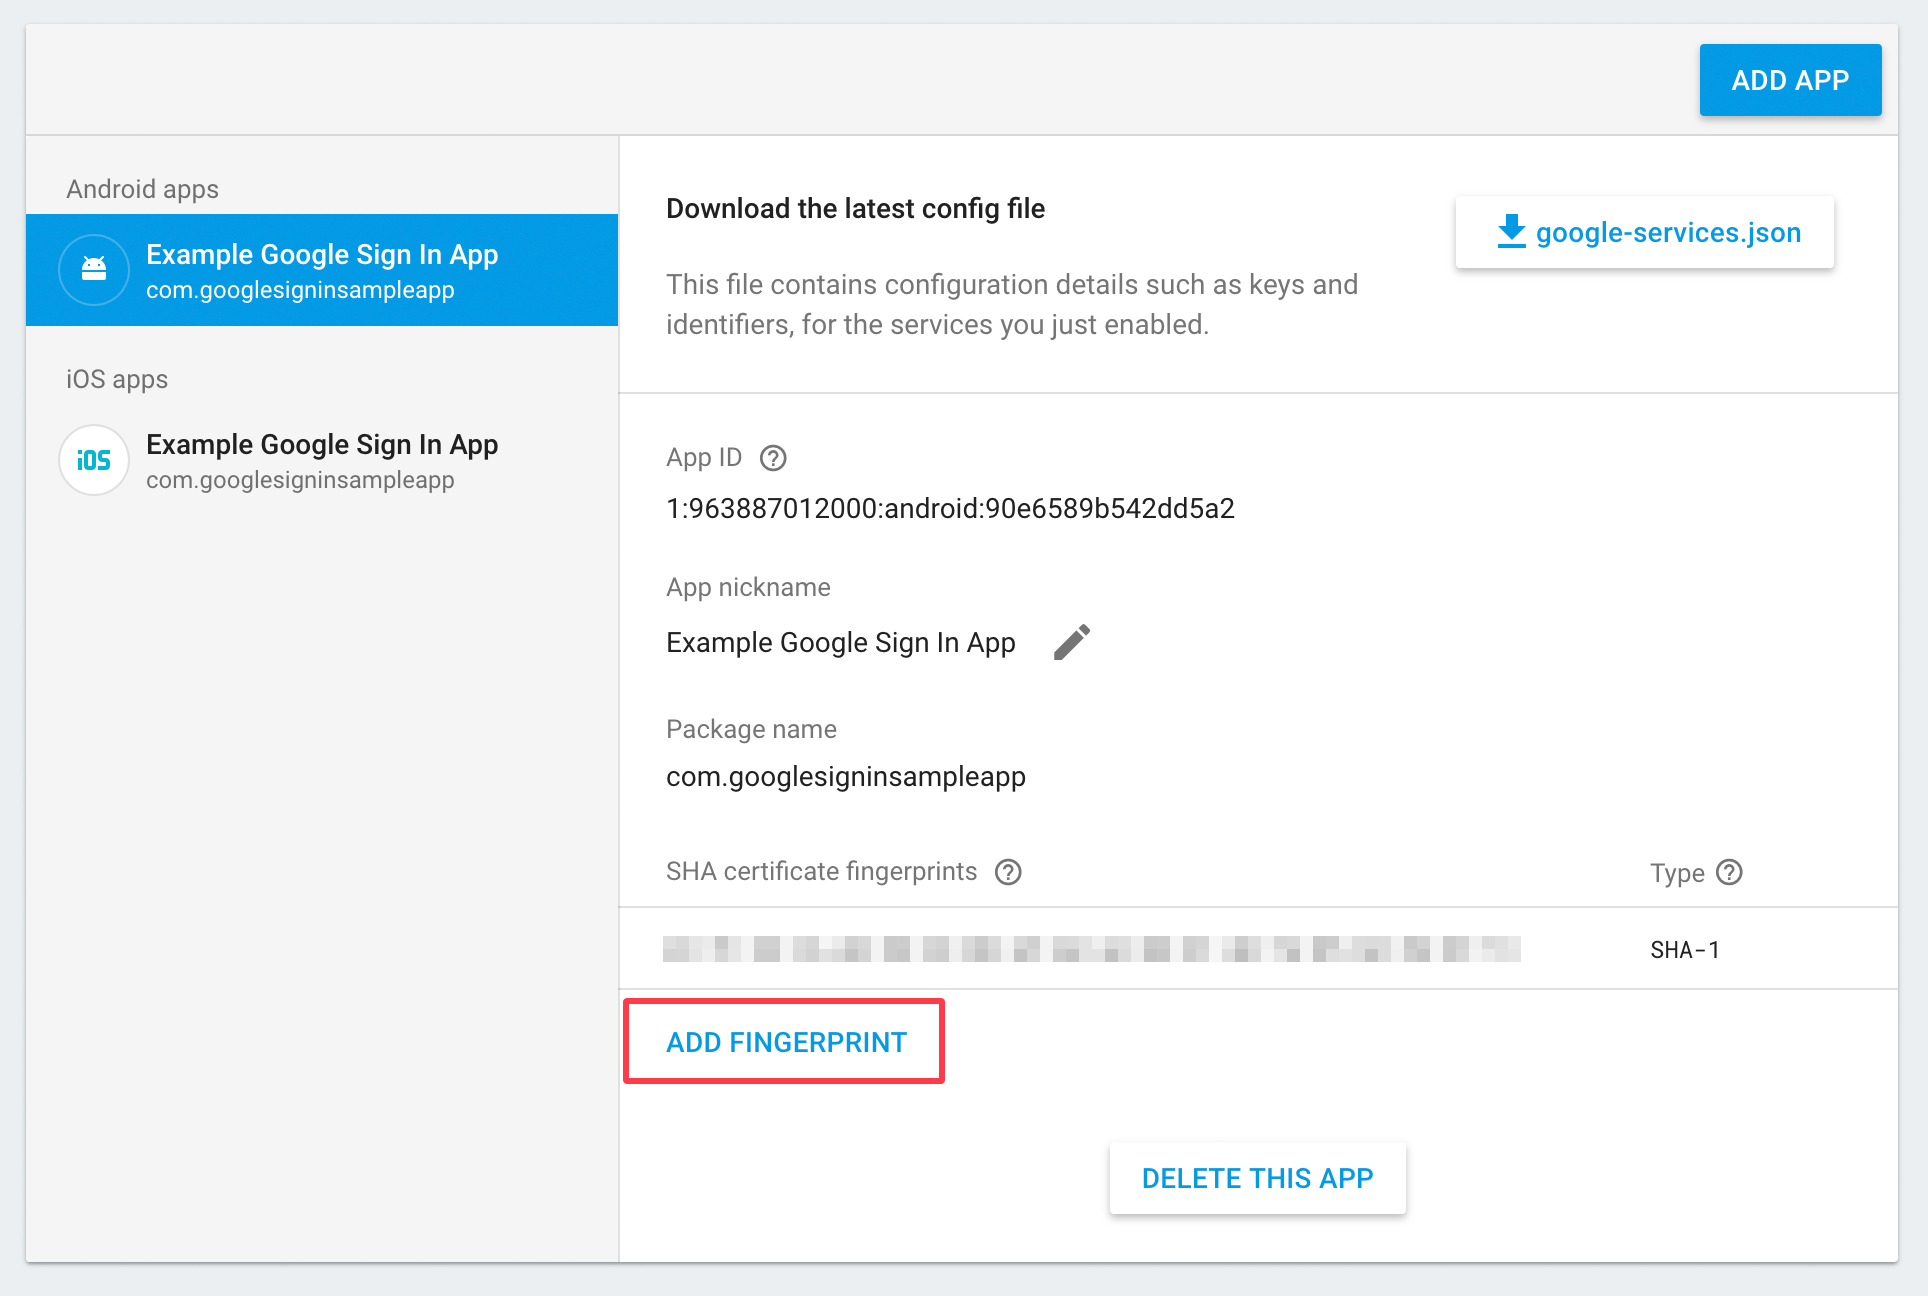
- Scroll down to "Your apps" section, and select the app.
- Click "Add fingerprint".
- Check that "Package name" is correct.
- Download the
google-services.jsonfile.
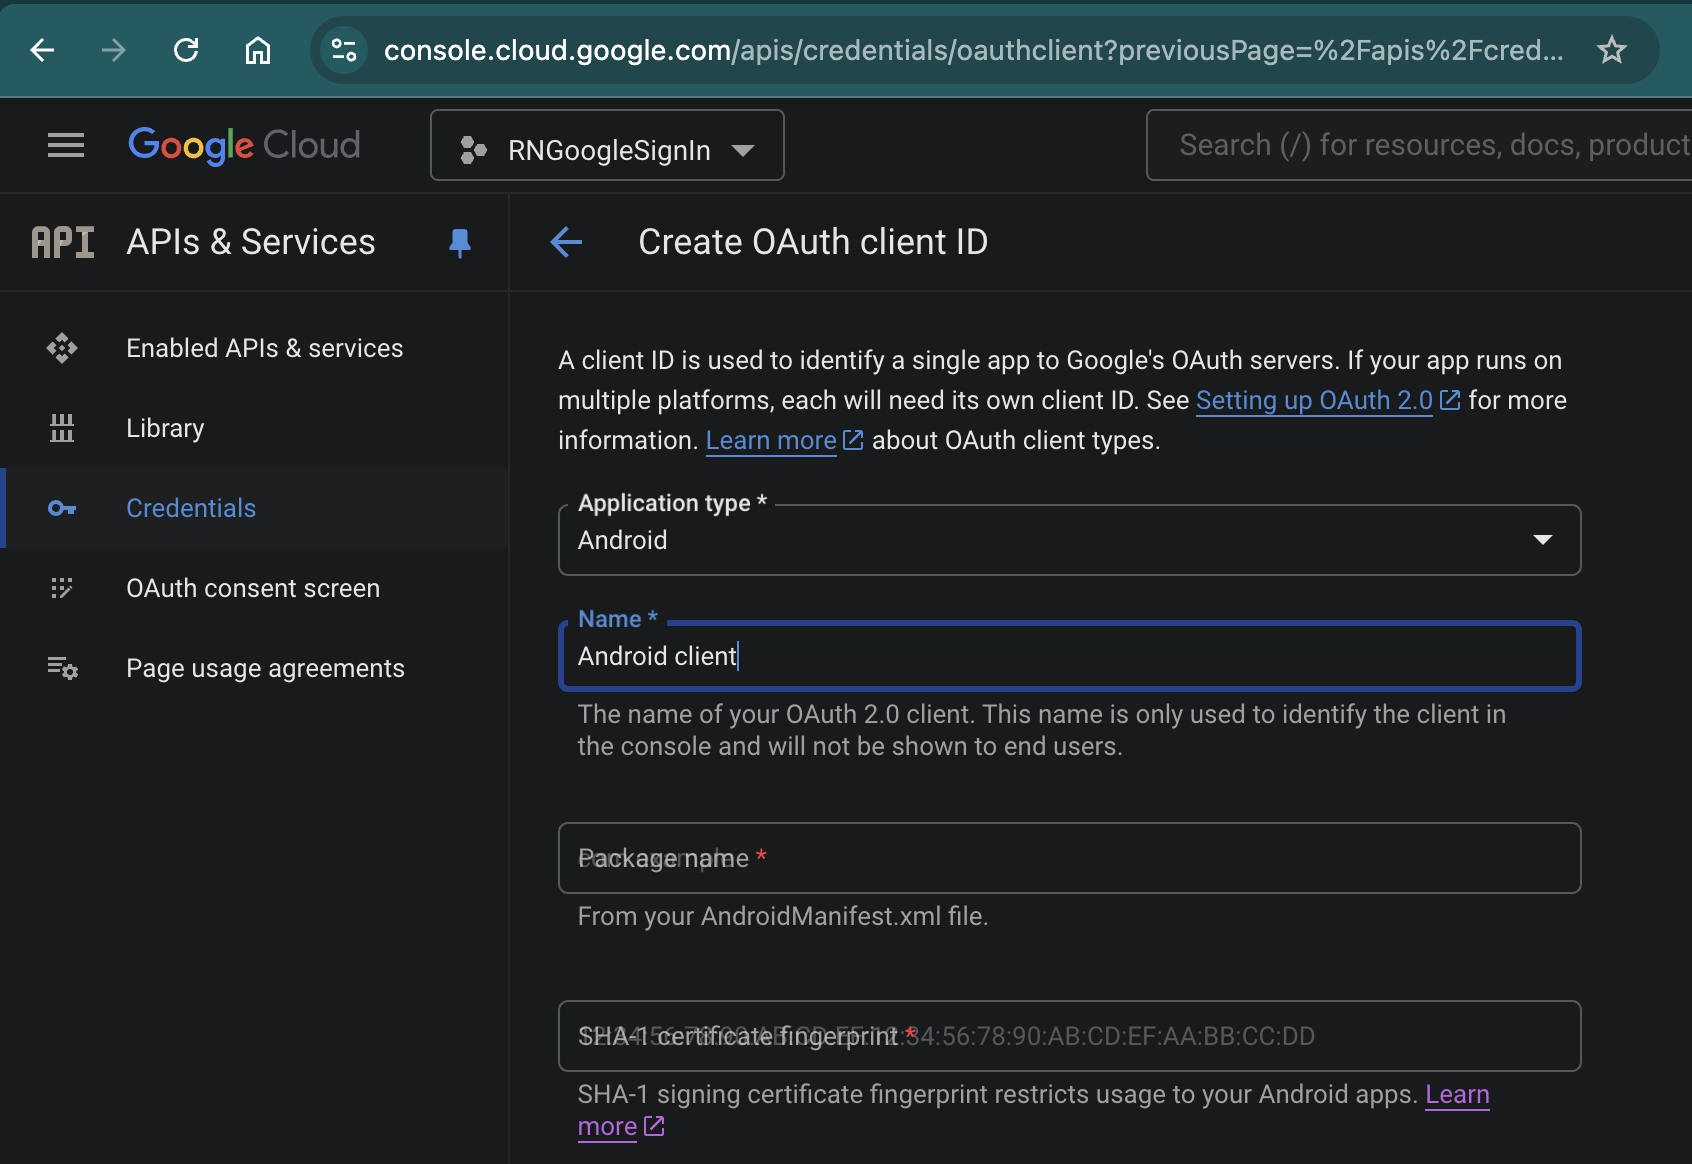
For each of the SHA-1 fingerprints you obtained, create an OAuth Client ID of type Android in Google Cloud Console - see the screenshot below.
Alternatively, use this wizard.
You will NOT need the created IDs later - the only goal here is for them to be created in the Google Cloud Console.
iOS
Read below on how to set up Google Sign In for your iOS app.
- When using Firebase
- When not using Firebase
- Sign in to Firebase Console and open your project.
- Ensure that in the "Authentication" menu, "Google" is enabled as "Sign-in method".
- Click the settings icon and go to "Project settings".
- Scroll down to "Your apps" section, and select the app.
- Check that "Bundle ID" is correct.
- Download the
GoogleService-Info.plistfile.
Remember that all created client IDs can be found in the Google Cloud Console.
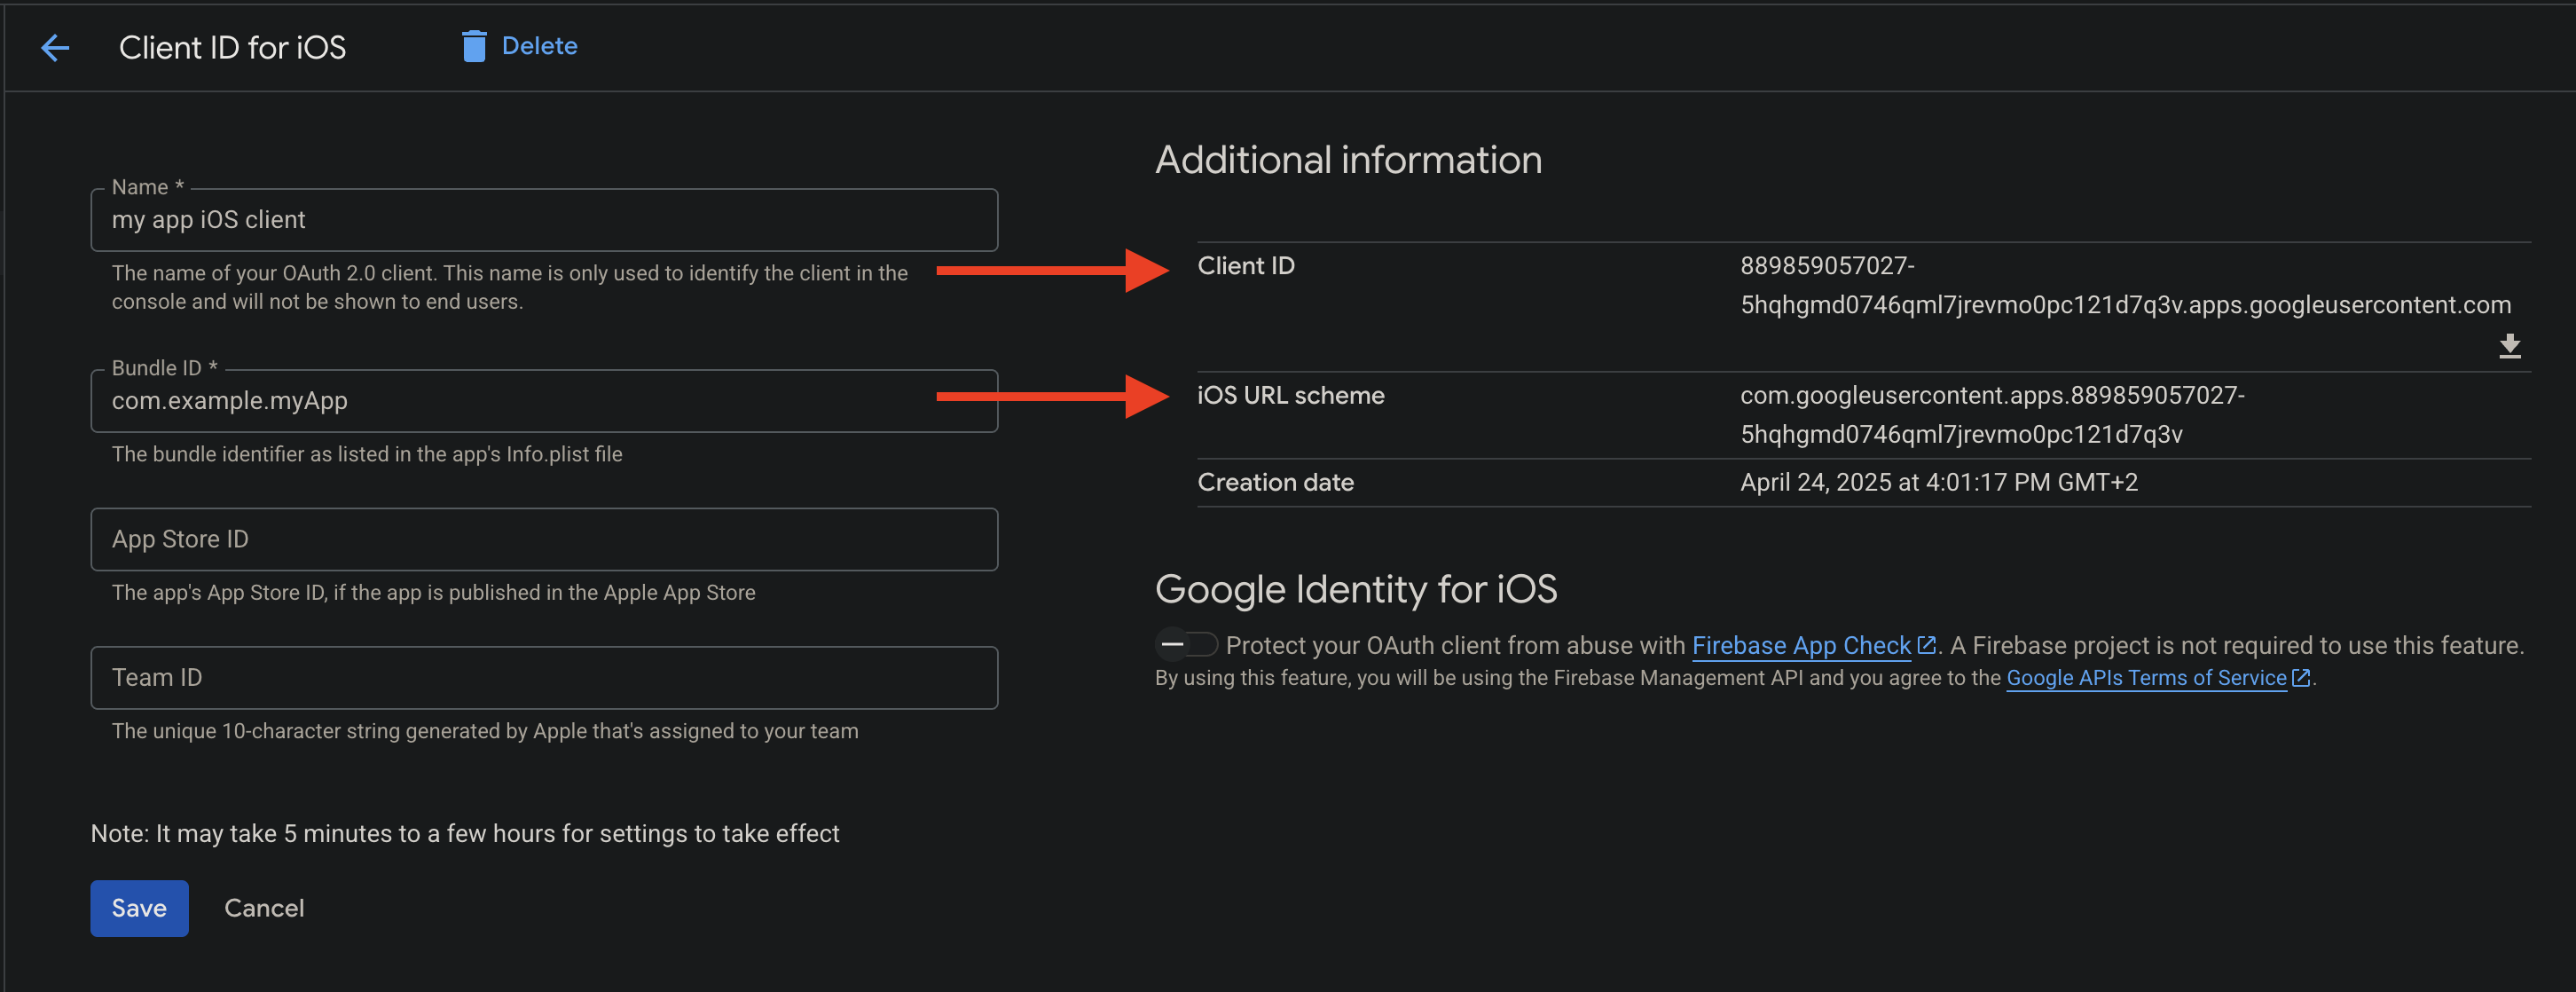
Obtain the "iOS OAuth Client ID" and "iOS URL scheme" (also known as reversed client id): Create an OAuth Client ID of type iOS in Google Cloud Console as seen in the screenshot below. Alternatively, use this wizard.
You will need the iOS Client ID and iOS URL scheme later.
Web Client ID
To get a Web Client ID (for the configure() call), go to Google Cloud Console and find an existing one (it may have been already created by Firebase) or create a new OAuth Client ID of type Web.
Summary
At the end of this guide, regardless of whether you use Firebase, when you visit Google Cloud Console, you should have in the "OAuth 2.0 Client IDs" section:
- Android OAuth Client ID(s) with SHA-1 fingerprints
- iOS OAuth Client ID(s) with iOS URL scheme
- Web Client ID